How I Set up Every GameMaker Project
Whenever I start a new GameMaker project I have a handful of steps before I get into coding. For starters, I deleted all existing asset folders and create new ones. And now that Gamemaker removed the default asset folders on every new project I decided to share my setup. This is not a tutorial, but my routine of creating a new project.
This setup is optimized for solo projects that I expect to grow beyond prototypes, it will absolutely be overkill for jams and small experiments. So here's a small disclaimer: The code snippets below are simplified examples, not drop-in solutions.
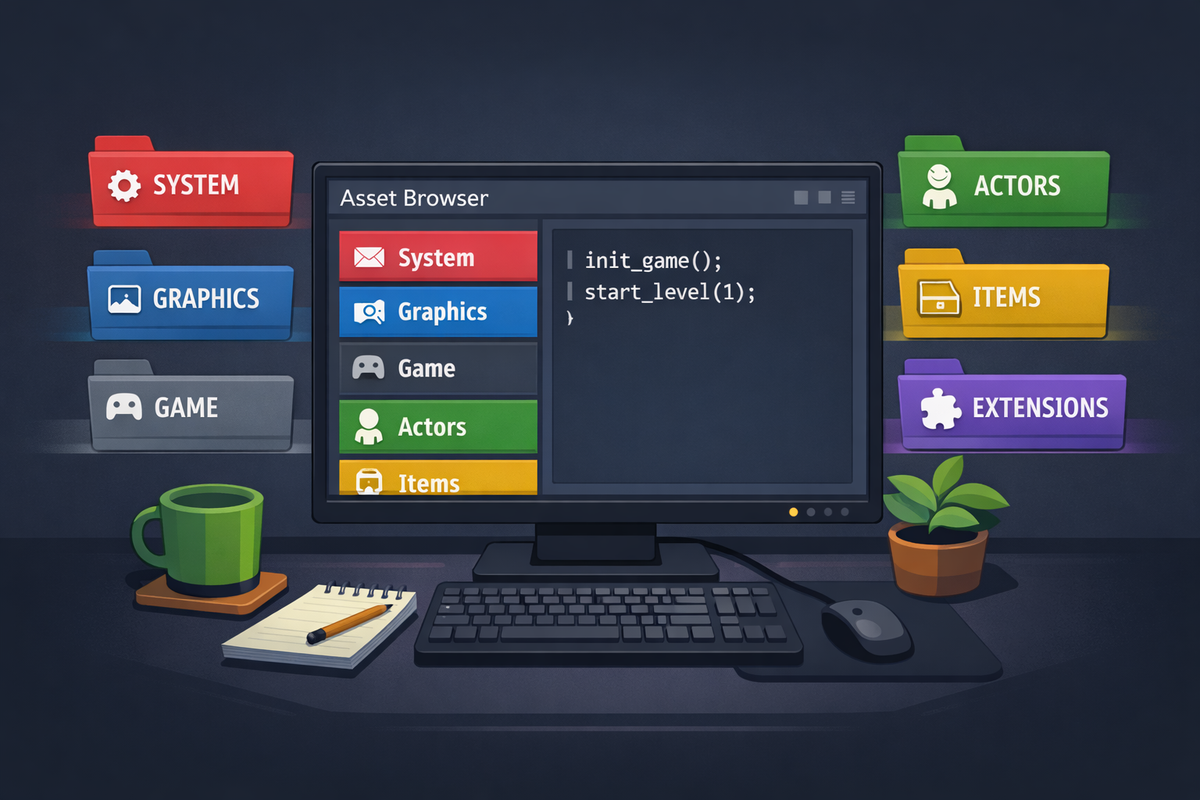
Rearrange the Asset Browser
Usually I create 6 new folders, where I put all future assets based on their purpose. Those folders are:
- SYSTEM
Here's everything that is essential to the game, but not game loop related: Camera and screen setup, configuration handling, scripts for debugging, etc. - GRAPHICS
Sprites, tilemaps, fonts, particle effects, etc. go here. - GAME
This folder contains the global game code. Game managers, state machines, but also code for the main menu, ingame UI elements - ACTORS
I began to call every creature in my games "actors". So this folder contains everything related to players, enemies and NPCs. - ITEMS
The same as ACTORS, but for items. - EXTENSIONS
All extensions and libraries I use in my game are stored here.
The next step is optional, but I found it helpful to navigate. I set a background color for each folder. Usually I use red for SYSTEM, blue for GRAPHICS, green for ACTORS, but this is up to everyone's liking.
All main folders get several sub folders, but they most likely differ in each folder and project and grow during development. They are emergent and only created when needed. For SYSTEM i usually have "Rooms", "Managers" and "Scripts", GRAPHICS gets "Sprites", "Tilesets", "Fonts", "UI", etc.
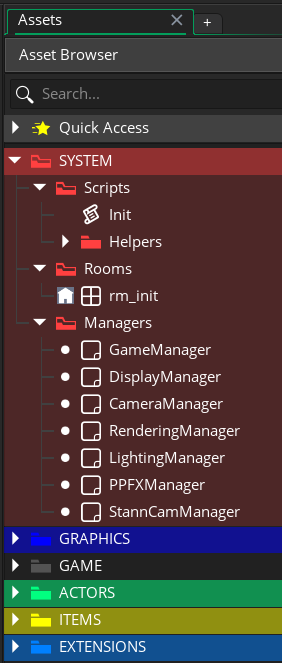
In the above image I have 2 camera managers, because I'm experimenting with two different camera assets: the great StannCam and a yet to be released camera by Foxy Of Jungle, the creator of such great assets like PPFX or the Crystal Lighting Engine. This makes it possible to enable/disable my camera managers on demand, when I test features like zooming, shaking the camera, etc.
The Boot Sequence
The Boot Sequence is deliberately strict in all of my projects. It emerged from the need to have certain initializations always at the beginning of a game, e.g. setting up sound or loading a config file and switch to full screen/window mode. It has three core components: an initialization script, the first room and the Game Manager. Let's start with the script, which is called Init():
gml_pragma("global", "Init()")


#macro ROOM_START    rm_mainmenu

#macro ROOM_MAINMENU rm_mainmenu
#macro ROOM_GAME     rm_game

#macro DEBUG         false

function Init()
{
}
You might wonder about the first line. gml_pragma() affects how the code is compiled. It takes at least one parameter - the so called command - and some have additional parameters. Check out the manual for further instructions. The speciality of "global" is that the code is called before anything else, even before the first room is created. Therefore I use the Init() script to load configuration files and everything that needs to be done before the game starts. Those information are stored in global vars, which I can use throughout the whole project.
I also put some macros in here, they are constants I use throughout my game. You might wonder, why I put room names in macros and why rm_mainmenu is defined twice. ROOM_START is the name of the first room that is shown to the player. Usually this is the main menu, but during development it's possible that I have a room called rm_test, where I want to test something. Then I would change ROOM_START to rm_test and when I run the game it jumps directly to my test room instead to the main menu.
My first room is called rm_init. It contains no graphics, but some persistent game objects that I need ingame. All end on "manager", because they manage the game. Those usually are:
- GameManager
This is the most important game object. It controls the game loop, e.g. showing the main menu, starting the game, clean up when exiting, etc. - CameraManager
The camera manager sets the resolution, handles window modes and controls the camera during gameplay, e.g. following the player. - LevelManager
The level manager prepares everything in a level, loads the next one, resets level state, etc.
There might be additional managers, e.g. for post processing or menu management. My rule is: if it manages something, put it in a game object. In the beginning I had managers handle multiple things (e.g. the CameraManager also handled post processing), but it's easier to have everything in seperate managers, especially when debugging or replacing a whole component of the game. Therefore I also never call a manager directly from another one - instead I use functions to capsulate. This makes it much easier to replace functionality, when a manager grows too large.
The Game Manager
My Game Manager usually one uses these 3 events:
// == Create event
debug_overlay = false;
alarm[0] = 1;

// == Step Event
room_goto(ROOM_START);

//== Key Press - F12
if (!DEBUG) exit;

debug_overlay = !debug_overlay;
show_debug_overlay(debug_overlay);
As previously stated the Game Manager is my most important manager, despite having only a few lines of code. debug_overlay is defined to hold if the debug menu is shown or not, when pressed F12. The defined alarm event makes sure that the initial window is created before it switches to the next room. DEBUG is set as a macro in the boot sequence.
Summary
As you see the old folders of GameMaker can easily be replaced with a customized structure to make your project better organized. Setting the project up like this slowed me down at first, but paid off eventually, because I don't have to search for sprites, objects or scripts and always know where I have to look for them. I'm honestly glad that YoYo Games made the empty asset browser a default.
I probably explain one of my manager setups in a future post.
Good to know: if you still want to use the old folder structure in the asset browser you can do this easily by opening the GameMaker preferences and check "Create default groups in new project" in the "Asset Browser" settings. This only works for new projects, though.